Photo Editing
Xara Designer Pro X-365 — First Look
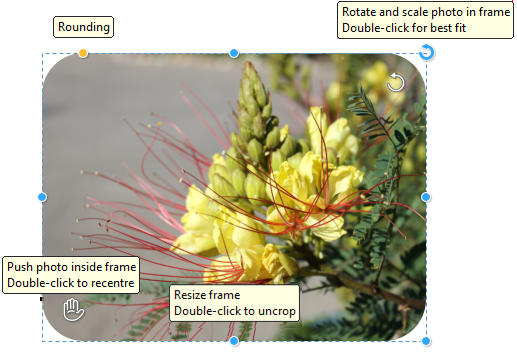
Smart Straighten/Scale Xara has added some of the new SmartShapes controls to your
photos resulting in a more streamlined and intuitive way to edit the size and shape of
your photos. You can see the new controls in the photo above. These controls let you
scale, crop, rotate, resize, and move your photos around inside of the photo shape. You
can even round the corners. There are tool tips that appear over each control point that
explain that point’s functions. The only bit of confusion for me is the dual rotation
arrows top right. The blue rotation handle rotates the physical photo itself while the
inside white arrow rotates and resizes the photo inside the photo shape. It is a welcome
and elegant way to manage your photos.

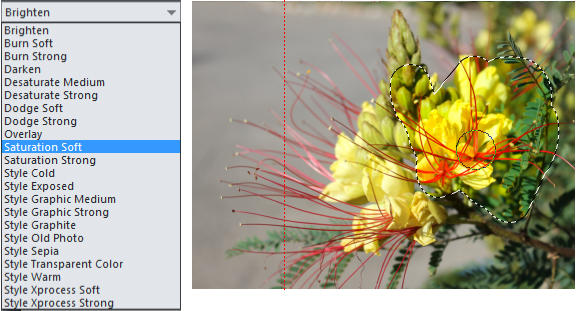
The Effect Painter This new feature lets you edit portions of your image with a variety
of available effects. As with the Shape Painter and similar tools, you select an effect, a
brush size, determine the angle, and softness of the brush, and then paint over a
portion of a photo to apply the effect. In the example below, I used Saturation Soft to
brighten the yellow flowers and red stamens. The best way to see what changes these
different effects bring about it to try them out. They are “non destructive” and are
applied over the photo and can be selected and removed at any time, unless you select
the option to Flatten Photo Group (Arrange menu), at which point the effects become
permanently added to the photo.
The Magnetic Lasso Tool is worth the cost of the program in my opinion. It works best
when there is a clear distinction between areas as with the rose shown here. But it
could not be easier. Select the photo and click along the edges, and the Magnetic Lasso
snaps to the edges of the
photo until you reach the
starting point. You click more
or fewer points depending on
the complexity of the shape.
When you have completed the
outline, you can cut, copy, and
paste the selection. It could
not be easier!


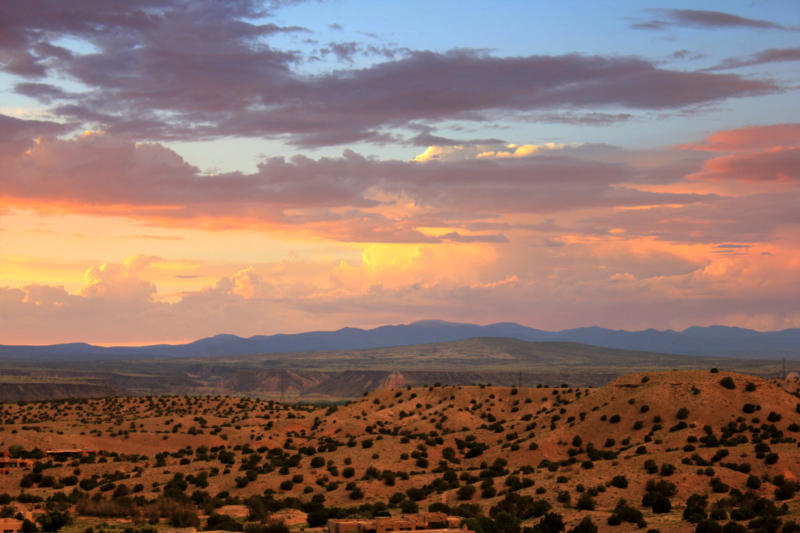
PanoramaStudio 3.0 Designer Pro X 365 has a really easy to use Create Panorama tool
(In the Photo Tool fly-out menu) that seamlessly stitches together a series of up to
eight overlapping images into a panorama such as my photo above. And for several
versions, owners of Designer Pro X have had the opportunity to download and install
PanoramaStudio, a heavy duty professional utility for creating wide angle photos and
even 360 degree panorama images and which is free to Designer Pro X owners.
New PanoramaStudio 3.0 is included with Designer Pro X 365 (Help > Download
Content Installer & Pan Studio). It features a range of professional features including
the completely redesigned HTML5 panorama viewer for in browser, interactive
panoramas. Click on the image above to see an example. Images can be imported
directly from over 2,200 digital compact and SLR cameras. And the RAW image import
filter has been updated.
[Click image to see Panorama Player]
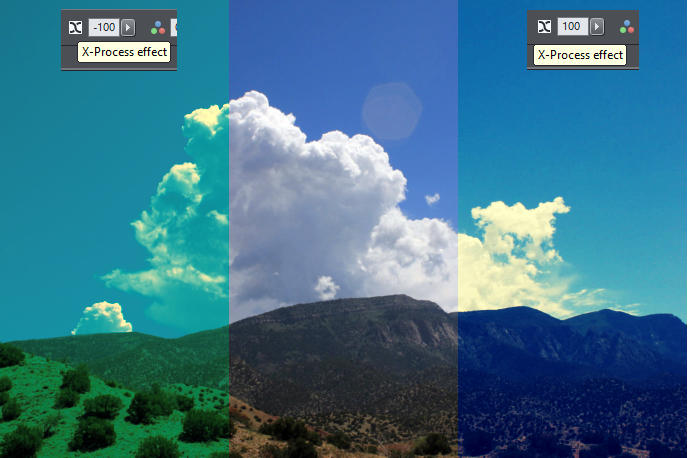
The X-Process Effect This is a new tool in the Photo Tool fly-out menu that according
to the release notes simulates a photo processing technique that historically used the
wrong chemicals for developing film. In my example above the center image is the
original and the full X-Process effect has been applied to the outside images.
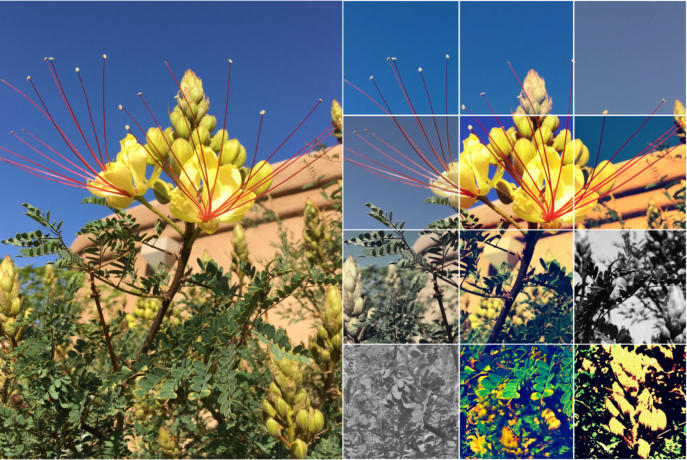
Photo Filter Presets A collection of 26 effects that you can apply to your photos to
achieve a variety of looks. I have selected 12 of these new effects to show here top
right. The Photo Filter Presets are found in the Content Catalog > Components > Image
Resources. You select your photo then select a Filter Preset and press Import. The filter
effect is downloaded and applied to the photo. Once you have imported the effect it is
added to the Local Designs Gallery.
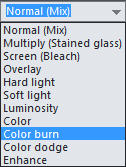
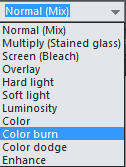
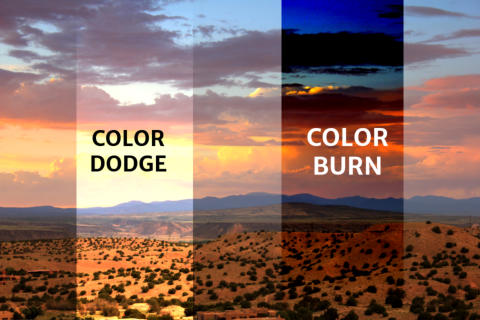
New Transparency Blend Modes There are two new transparency blend modes in the
Transparency (Blend) Mode drop down list, Color Dodge and Color Burn. These take
their names from the traditional darkroom techniques applied when making black and
white prints of dodging, making an area lighter, and burning, making an area darker.
The blend modes that were carried over in version 11, Brightness, Make Lighter, and
Make Darker are now gone. But using dodge and burn produces a similar effect but with
less loss of saturation.

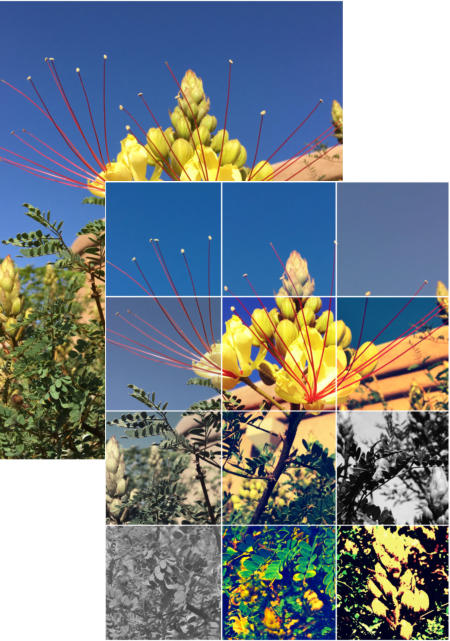
Photo Grids Xara Designer Pro X 365 now offers two types of photo grids (Content
Catalog > Components > Image Resources) Smart and Static. Smart Photo Grids such as
the example above make it easy to add, delete, scale, and move photos. You can add
additional photos and photo rows. In short, a very intuitive way to put together a
montage of photos. The other type of photo grid is static. These are arranged in
different sizes, aspect ratios and configuration. With both smart and static, you just
drag and drop your photos onto the existing ones. You will love these.
![[BACK TO TOP]](index_html_files/1914.png)
Saturation Soft makes the colors brighter
![[NEXT PAGE]](index_html_files/1922.png)
![PREVIOUS PAGE]](index_html_files/1967.png)

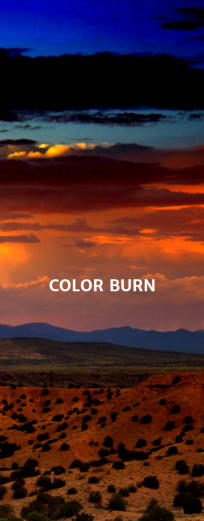

Photo Editing
Xara Designer Pro X-365 — First Look

Smart Photo Straighten/Scale Xara has
added some of the new SmartShapes
controls to your photos resulting in a more
streamlined and intuitive way to edit the
size and shape of your photos. You can see
the new controls in the photo above. These
controls let you scale, crop, rotate, resize,
and move your photos around inside of the
photo shape. You can even round the
corners. There are tool tips that appear over
each control point that explain that point’s
functions. The only bit of confusion for me
is the dual rotation arrows top right. The
blue rotation handle rotates the physical
photo itself while the inside white arrow
rotates and resizes the photo inside the
photo shape. It is a welcome and elegant
way to manage your photos.

The Effect Painter This new feature lets
you edit portions of your image with a
variety of available effects. As with the
Shape Painter and similar tools, you select
an effect, a brush size, determine the angle,
and softness of the brush, and then paint
over a portion of a photo to apply the
effect. In the example below, I used
Saturation Soft to brighten the yellow
flowers and red stamens. The best way to
see what changes these different effects
bring about it to try them out. They are
“non destructive” and are applied over the
photo and can be selected and removed at
any time, unless you select the option to
Flatten Photo Group (Arrange menu), at
which point the effects become
permanently added to the photo.
The Magnetic Lasso Tool is worth the cost
of the program in my opinion. It works best
when there is a clear distinction between
areas as with the rose shown here. But it
could not be easier. Select the photo and
click along the edges, and the Magnetic
Lasso snaps to the edges of the photo until
you reach the starting point. You click more
or fewer points depending on the
complexity of the shape.
When you have completed the outline, you
can cut, copy, and paste the selection. It
could not be easier!


PanoramaStudio 3.0 Designer Pro X 365
has a really easy to use Create Panorama
tool (In the Photo Tool fly-out menu) that
seamlessly stitches together a series of up
to eight overlapping images into a
panorama such as my photo above. And for
several versions, owners of Designer Pro X
have had the opportunity to download and
install PanoramaStudio, a heavy duty
professional utility for creating wide angle
photos and even 360 degree panorama
images and which is free to Designer Pro X
owners.
New PanoramaStudio 3.0 is included with
Designer Pro X 365 (Help > Download
Content Installer & Pan Studio). It features
a range of professional features including
the completely redesigned HTML5
panorama viewer for in browser, interactive
panoramas. Click on the image above to see
an example. Images can be imported
directly from over 2,200 digital compact
and SLR cameras. And the RAW image
import filter has been updated.
[Click image to see the HTML5 Panorama Player]
Photo Filter Presets A collection of 26
effects that you can apply to your photos to
achieve a variety of looks. I have selected 12
of these new effects to show here top right.
The Photo Filter Presets are found in the
Content Catalog > Components > Image
Resources. You select your photo then
select a Filter Preset and press Import. The
filter effect is downloaded and applied to
the photo. Once you have imported the
effect it is added to the Local Designs
Gallery.
New Transparency Blend
Modes There are two new
transparency blend modes in
the Transparency (Blend)
Mode drop down list, Color
Dodge and Color Burn. These
take their names from the traditional
darkroom techniques applied when making
black and white prints of dodging, making
an area lighter, and burning, making an
area darker. The blend modes that were
carried over in version 11, Brightness, Make
Lighter, and Make Darker are now gone. But
using dodge and burn produces a similar
effect but with less loss of saturation.
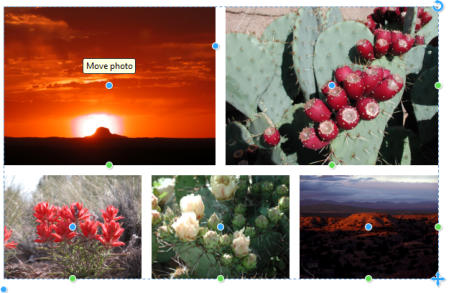
Photo Grids Xara Designer Pro X 365 now
offers two types of photo grids (Content
Catalog > Components > Image Resources)
Smart and Static. Smart Photo Grids such as
the example above make it easy to add,
delete, scale, and move photos. You can add
additional photos and photo rows. In short,
a very intuitive way to put together a
montage of photos. The other type of photo
grid is static. These are arranged in
different sizes, aspect ratios and
configuration. With both smart and static,
you just drag and drop your photos onto the
existing ones. You will love these.
![[BACK TO TOP]](index_html_files/1943.png)
Saturation Soft makes the colors brighter
![[NEXT PAGE]](index_html_files/1944.png)
![PREVIOUS PAGE]](index_html_files/1982.png)